mirror of
https://github.com/NohamR/knowledge-kit.git
synced 2026-05-24 20:00:37 +00:00
211 lines
7.3 KiB
Markdown
211 lines
7.3 KiB
Markdown
# 复制层(CAReplicatorLayer)
|
||
|
||
> 对于下面的效果大家是否有实现思路?
|
||
>
|
||
> 有些人可能要说:老夫撸起袖子,敲键盘就是干,不需要手势交互,那么直接用5个**CALayer**,处理不同的位置以及定时器、透明度等等,貌似很简单。
|
||
>
|
||
> 不不不,今天要带出来的主题是 **CAReplicatorLayer**
|
||
|
||
|
||
|
||
|
||
|
||
|
||
|
||
|
||
## 1、CAReplicatorLayer
|
||
|
||
> /* The replicator layer creates a specified number of copies of its
|
||
>
|
||
> - sublayers, each copy potentially having geometric, temporal and
|
||
> - color transformations applied to it.
|
||
>
|
||
> *
|
||
>
|
||
> - Note: the CALayer -hitTest: method currently only tests the first
|
||
> - instance of z replicator layer's sublayers. This may change in the
|
||
> - future. */
|
||
|
||
官方给出的意思就不翻译了,使用场景大致是一个形状、特性差不多的 layer,我们不需要重复创建,可以利用它来实现复制多个 layer ,然后通过 CAReplicatorLayer 的一些属性实现我们的需求。
|
||
|
||
|
||
|
||
上述效果的代码
|
||
|
||
```objective-c
|
||
//创建复制层,因为我们做的多个音量柱变化的动画都是一样的,所以创建了一个复制层,这个复制层可以对里面的 sublayer 进行复制,所以我们不需要重复创建了
|
||
|
||
CAReplicatorLayer *replicatorrLayer = [CAReplicatorLayer layer];
|
||
replicatorrLayer.frame = CGRectMake(0, 0, self.contentView.frame.size.width, self.contentView.frame.size.height);
|
||
replicatorrLayer.backgroundColor = [UIColor blackColor].CGColor;
|
||
self.replicatorrLayer = replicatorrLayer;
|
||
[self.contentView.layer addSublayer:replicatorrLayer];
|
||
|
||
|
||
//创建音量震动条
|
||
CALayer *layer = [CALayer layer];
|
||
layer.backgroundColor = [UIColor whiteColor].CGColor;
|
||
CGFloat width = 30;
|
||
CGFloat height = 100;
|
||
layer.bounds = CGRectMake(0, self.contentView.frame.size.height - height, width, height);
|
||
layer.anchorPoint = CGPointMake(0, 1);
|
||
layer.position = CGPointMake(0, self.contentView.frame.size.height);
|
||
[self.contentView.layer addSublayer:layer];
|
||
|
||
//创建音量震动动画
|
||
CABasicAnimation *animation = [CABasicAnimation animationWithKeyPath:@"transform.scale.y"];
|
||
animation.toValue = @0;
|
||
animation.duration = 1;
|
||
animation.repeatCount = MAXFLOAT;
|
||
animation.autoreverses = YES;
|
||
[layer addAnimation:animation forKey:nil];
|
||
|
||
|
||
[replicatorrLayer addSublayer:layer];
|
||
|
||
//* The number of copies to create, including the source object.
|
||
replicatorrLayer.instanceCount = 6; //复制 sublayer 的个数,包括创建的第一个sublayer 在内的个数
|
||
replicatorrLayer.instanceDelay = 0.4; //设置动画延迟执行的时间
|
||
replicatorrLayer.instanceAlphaOffset = -0.15; //设置透明度递减
|
||
replicatorrLayer.instanceTransform = CATransform3DMakeTranslation(50, 0, 0);
|
||
```
|
||
[源码地址](https://github.com/FantasticLBP/BlogDemos/tree/master/复制层应用1-音量柱动画)
|
||
|
||
|
||
|
||
|
||
## 例子1
|
||
|
||
|
||
|
||
这里比较简单了,关键代码
|
||
|
||
```objective-c
|
||
CAReplicatorLayer *replicatorLayer = (CAReplicatorLayer *)self.view.layer;
|
||
replicatorLayer.instanceCount = 2;
|
||
replicatorLayer.instanceTransform = CATransform3DMakeRotation(M_PI, 1, 0, 0);
|
||
replicatorLayer.instanceRedOffset -= 0.1;
|
||
replicatorLayer.instanceGreenOffset -= 0.1;
|
||
replicatorLayer.instanceBlueOffset -= 0.1;
|
||
replicatorLayer.instanceAlphaOffset -= 0.3;
|
||
```
|
||
|
||
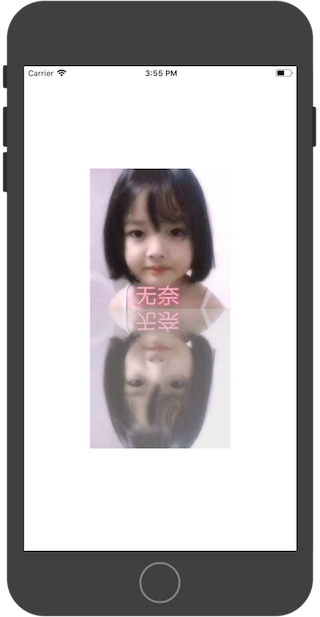
- 需要说明是这里我用 storyboard 处理的,因为已经拉好了控件,所以我们没办法将图片直接加到复制层上去。间接做法是将 UIViewController 的 view 的 layer 类型改变为 复制层
|
||
|
||
```
|
||
//该方法返回 UIView 的层
|
||
//改写 UIView 的层:重写 layerClass 方法
|
||
+ (Class)layerClass{
|
||
return [CAReplicatorLayer class];
|
||
}
|
||
```
|
||
[源码地址](https://github.com/FantasticLBP/BlogDemos/tree/master/复制层应用2-倒影效果)
|
||
|
||
|
||
## 例子2
|
||
|
||
|
||
|
||
|
||
需求分析:
|
||
|
||
- 先画图。也就是添加一个滑动手势并监听它。然后强制绘图(self setNeedsDisplay)
|
||
|
||
- 添加一个 layer 到 self.layer 上
|
||
|
||
- 改变当前 view 的 layer 类型。
|
||
|
||
```
|
||
+ (Class)layerClass{
|
||
return [CAReplicatorLayer class];
|
||
}
|
||
```
|
||
|
||
- 设置 CAReplicatorLayer 的 instanceCount 和 instanceDelay 属性
|
||
|
||
- 添加了小点,并为小点设置关键帧动画。
|
||
|
||
- 重置功能实现靠的是清除 path 上面的 points ,并移除 小点上面的动画
|
||
|
||
```
|
||
#import "ViewControllerView.h"
|
||
|
||
@interface ViewControllerView()
|
||
|
||
@property (nonatomic, strong) UIBezierPath *path;
|
||
@property (nonatomic, weak) CALayer *dotLayer;
|
||
@end
|
||
|
||
@implementation ViewControllerView
|
||
|
||
+ (Class)layerClass{
|
||
return [CAReplicatorLayer class];
|
||
}
|
||
|
||
- (void)awakeFromNib{
|
||
[super awakeFromNib];
|
||
|
||
UIPanGestureRecognizer *tapGesture = [[UIPanGestureRecognizer alloc] initWithTarget:self action:@selector(draw:)];
|
||
[self addGestureRecognizer:tapGesture];
|
||
self.path = [UIBezierPath bezierPath];
|
||
|
||
CALayer *layer = [CALayer layer];
|
||
layer.frame = CGRectMake(-UIScreen.mainScreen.bounds.size.width, 0, 15, 15);
|
||
layer.backgroundColor = [UIColor orangeColor].CGColor;
|
||
layer.cornerRadius = 7.5;
|
||
self.dotLayer = layer;
|
||
[self.layer addSublayer:layer];
|
||
|
||
CAReplicatorLayer *replicatorLayer = (CAReplicatorLayer *)self.layer;
|
||
replicatorLayer.instanceCount = 20;
|
||
replicatorLayer.instanceDelay = 0.25;
|
||
}
|
||
|
||
|
||
- (void)draw:(UIPanGestureRecognizer *)tap{
|
||
CGPoint currentPoint = [tap locationInView:self];
|
||
if (tap.state == UIGestureRecognizerStateBegan) {
|
||
[self.path moveToPoint:currentPoint];
|
||
}
|
||
else if(tap.state == UIGestureRecognizerStateChanged){
|
||
[self.path addLineToPoint:currentPoint];
|
||
[self setNeedsDisplay];
|
||
}
|
||
}
|
||
|
||
- (void)startAnimation{
|
||
//要实现动画围绕着给定的形状执行,那么需要关键帧动画(类比于Flash概念中的关键帧动画,只需要给定指定的关键帧,其余的帧系统会创建出来。)。关键帧动画的 path 和 values 是互斥的,也就是说如果设置了 values 还设置了 path 那么 path 属性会覆盖 values 属性。
|
||
|
||
CAKeyframeAnimation *animation = [CAKeyframeAnimation animation];
|
||
animation.keyPath = @"position";
|
||
animation.path = self.path.CGPath;
|
||
animation.duration = 5;
|
||
animation.repeatCount = MAXFLOAT;
|
||
[self.dotLayer addAnimation:animation forKey:nil];
|
||
}
|
||
|
||
- (void)redraw{
|
||
//清空路径:移除 path 上面所有的点,然后重绘
|
||
[self.path removeAllPoints];
|
||
[self setNeedsDisplay];
|
||
//移除动画
|
||
[self.dotLayer removeAllAnimations];
|
||
}
|
||
|
||
- (void)drawRect:(CGRect)rect{
|
||
[self.path stroke];
|
||
}
|
||
|
||
@end
|
||
```
|
||
[源码地址](https://github.com/FantasticLBP/BlogDemos/tree/master/复制层应用3-粒子闪烁效果)
|
||
|
||
### CALayer 层的动画有2个概念非常重要:AnchorPoint 和 position
|
||
|
||
- postion 用来确定 layer 层在父层中的位置
|
||
|
||
- anchorPoint 用来确定 layer 身上哪个点会在 position 所指的位置。
|
||
|
||
|
||
|