4.9 KiB
RMHook
A dynamic library injection tool for the reMarkable Desktop macOS application, enabling connection to self-hosted rmfakecloud servers.
Overview
RMHook hooks into the reMarkable Desktop app's network layer to redirect API calls from reMarkable's official cloud services to your own rmfakecloud server. This allows you to maintain full control over your documents and data.
Features
- Network request interception and redirection
- WebSocket connection patching
Installation and usage
Important legal notice
⚠️ For legal reasons, this repository does not include a pre-patched reMarkable app. However, the latest compiled dylib is available in the Releases section.
Step 1: Prepare the reMarkable app
Uses the reMarkable Desktop app from your Applications folder or download it fresh from the Mac App Store.
Step 2: Inject the dylib
Use the provided injection script:
./scripts/inject.sh reMarkable.dylib reMarkable.app
This script will:
- Copy the dylib to the app bundle's Resources folder
- Inject the load command into the executable using
optool - Remove the code signature and resign with ad-hoc signature
- Remove the
_MASReceiptfolder - Fix file ownership
Step 3: Handle document storage
Important path changes
The original Mac App Store version stores data in sandboxed locations: Original sandboxed paths:
- App data:
~/Library/Containers/com.remarkable.desktop/Data - Documents:
~/Library/Containers/com.remarkable.desktop/Data/Library/Application Support/remarkable
After re-signing, the app is no longer sandboxed and will use standard paths:
- Config:
~/Library/Preferences/rmfakecloud.config - Documents:
~/Library/Application Support/remarkable
Migration options
Option 1: Create a symbolic link (recommended)
ln -s ~/Library/Containers/com.remarkable.desktop/Data/Library/Application\ Support/remarkable \
      ~/Library/Application\ Support/remarkable
The symbolic link approach allows you to keep using the original App Store version alongside the patched version.
Option 2: Move files
mv ~/Library/Containers/com.remarkable.desktop/Data/Library/Application\ Support/remarkable \
   ~/Library/Application\ Support/remarkable
Step 4: Configure rmfakecloud server
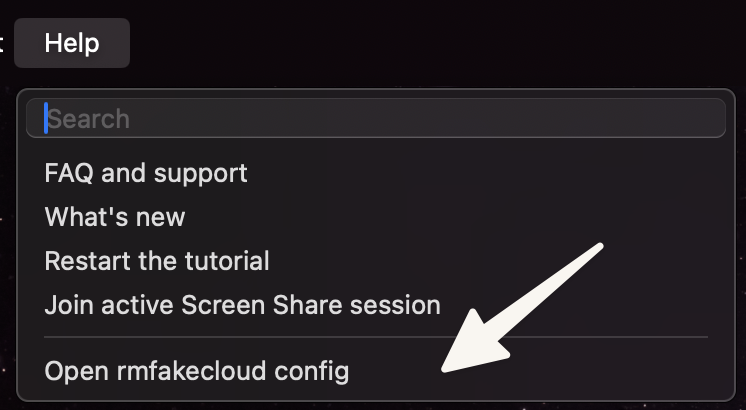
Quickly access the configuration file from the app's Help menu:
 Edit the configuration file at:
~/Library/Preferences/rmfakecloud.config
Example configuration:
{
  "host": "your-server.example.com",
  "port": 443
}
Step 5: Launch the patched app :p
How it works
RMHook uses tinyhook to hook into Qt framework functions at runtime:
- QNetworkAccessManager::createRequest - Intercepts HTTP/HTTPS requests
- QWebSocket::open - Patches WebSocket connections
When the app attempts to connect to reMarkable's servers (e.g., internal.cloud.remarkable.com), the hooks redirect these requests to your configured host and port.
Configuration
The config file (~/Library/Preferences/rmfakecloud.config) supports the following keys:
| Key | Type | Default | Description |
|---|---|---|---|
host |
String | example.com |
Your rmfakecloud server host |
port |
Number | 443 |
Your rmfakecloud server port |
If the config file doesn't exist, it will be created automatically with default values on first launch.
Troubleshooting
App won't launch
- Ensure the code signature was properly applied
- Check that
xattr -crwas run to clear quarantine attributes - Verify the dylib is in
Contents/Resources/folder
Document sync issues
- Ensure your rmfakecloud server is running and accessible
- Verify the storage path migration was completed
Credits
- tinyhook: Antibioticss/tinyhook - Function hooking framework
- rmfakecloud: ddvk/rmfakecloud - Self-hosted reMarkable cloud
- optool: alexzielenski/optool - Mach-O binary modification tool
License
This project is licensed under the MIT License. See the LICENSE file for details.
Disclaimer
This project is not affiliated with, endorsed by, or sponsored by reMarkable AS. Use at your own risk. This tool modifies the reMarkable Desktop application and may violate the application's terms of service.
Contributing
Contributions are welcome! Please feel free to submit issues or pull requests.
Building
- Clone the repository:
git clone http://github.com/NohamR/RMHook
cd RMHook
- Compile the dylib:
./scripts/build.sh