
14 KiB
Vue
Vue学习过程中遇到的一些小tips
1、组件化
Vue 的组件可以分为全局组件和局部组件
全局组件:声明好后可以在全局使用 局部组件:只可以在当前模块使用
//全局组件
Vue.componetns('todo-item',{
    template:'<li> { {content} } </li>',
    prop:['content']
});
//局部组件
var HobbyItem = {
   template:"<li>hobby</li>"
}

new Vue({
    el:"#test",
    components:{
        'todo-item':HobbyItem
    }
});
2、模块、实例
每一个模块都是 Vue 的一个实例,也就是说可以向每一个模版中像写 Vue 的实例一样进行开发。
3、父组件与子组件通信用 props 传递
4、子组件向外触发事件 this.$emit(事件名,参数列表)
5、template 模版下最外层只可有一个根元素
<template>
    <div>
        <p></p>
        ...
    </div>
</template>
6、单独在 .vue 文件中,data 是作为函数存在的。
data: function(){

}

data () {

}
7、在 vue-cli 脚手架中,组件的声明方式
export default{
    components : {
        'todo-item':Todo-Item
    }
}

components:['Todo-item']
8、style 中可以声明样式作用域 style 同名的样式不会对其他组件有影响
9、在用 Vue 框架在开发的时候一般都会用 Vue-cli 脚手架,但是这样经过 webpack 打包后源代码会被打包成 dist 目录下的 bundle.js,此时的代码是被压缩处理过的,且经过 webpack 的处理各个代码模块的逻辑,代码可读性不是很好且不可调试,此时有些人在开发阶段就会需要调试?此时怎么办呢
慌不要慌,小哥哥带你 hold 住全场。
- 脚手架已经帮你处理好了这块需求了,看下图
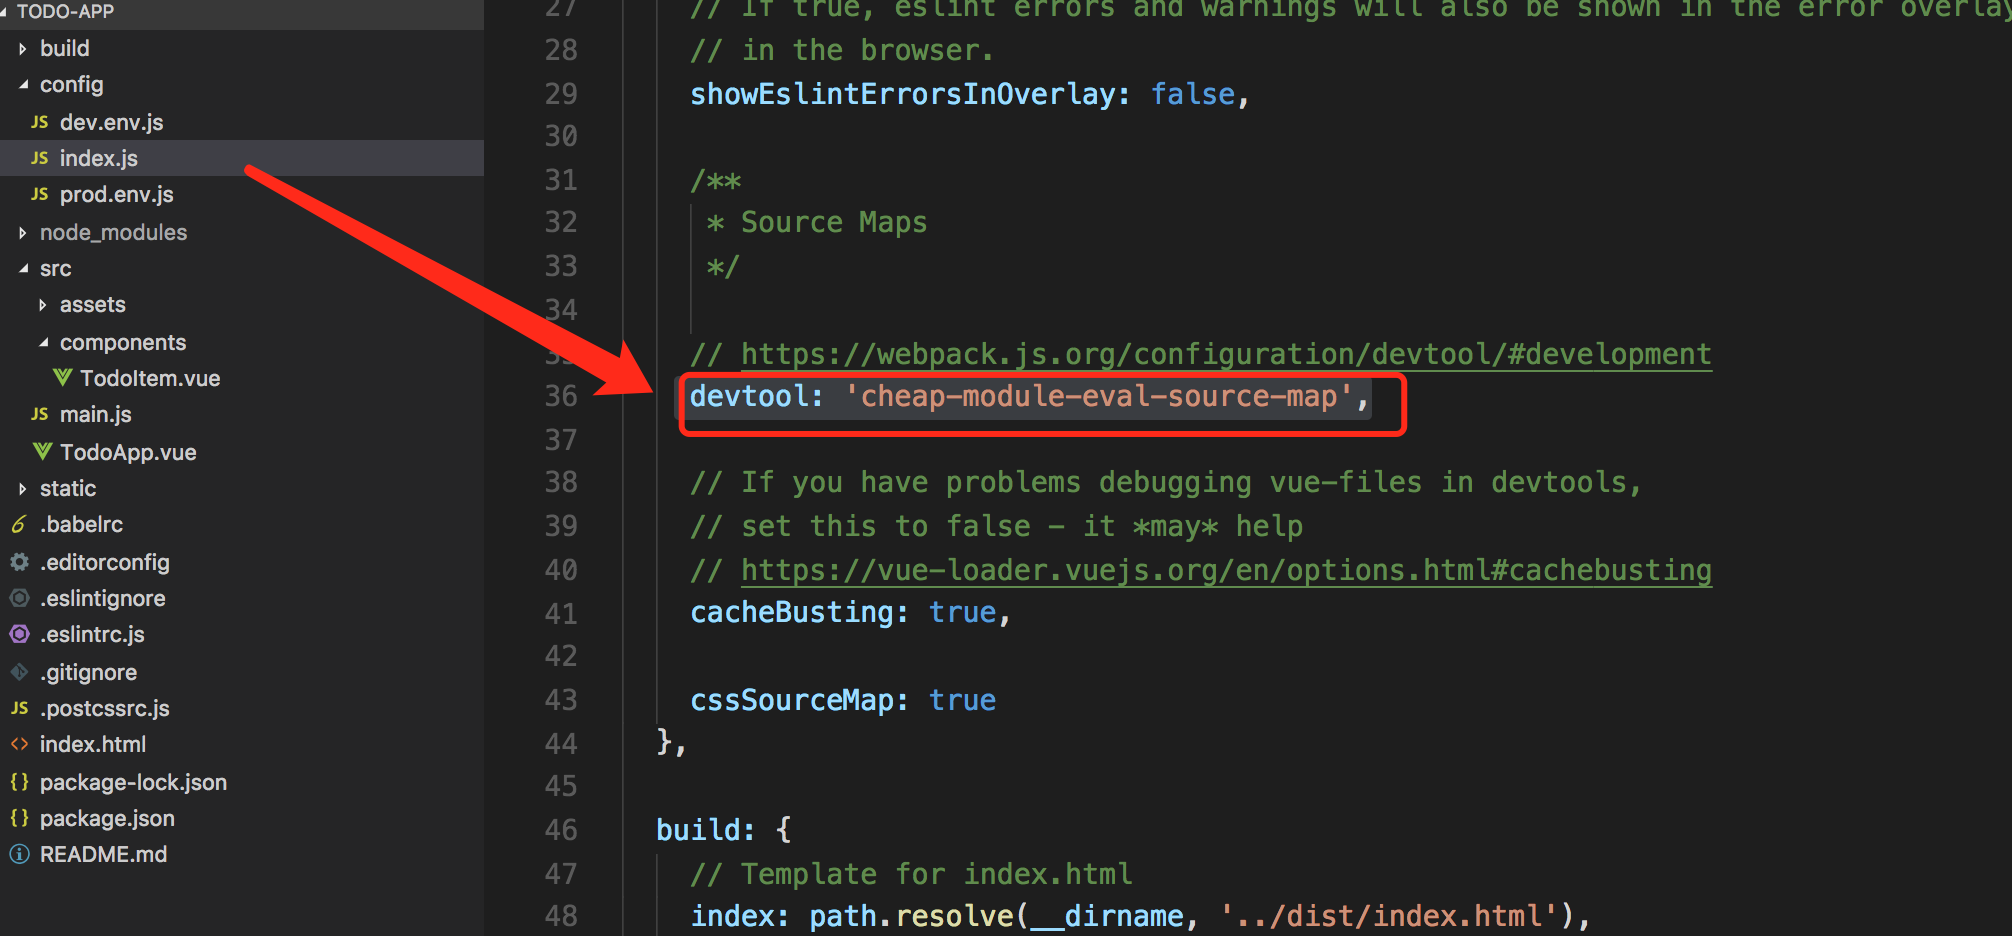
-
有些大佬不要脚手架,喜欢自己初始化项目,用 npm 挨个安装所需要的依赖。然后自己配置 webpack 的 options。需要调试的话,需要做下面的配置
config.devtool = '#cheap-module-eval-source-map'
这样你就可以在浏览器当中像写普通的 JS 一样进行调试代码了。比如
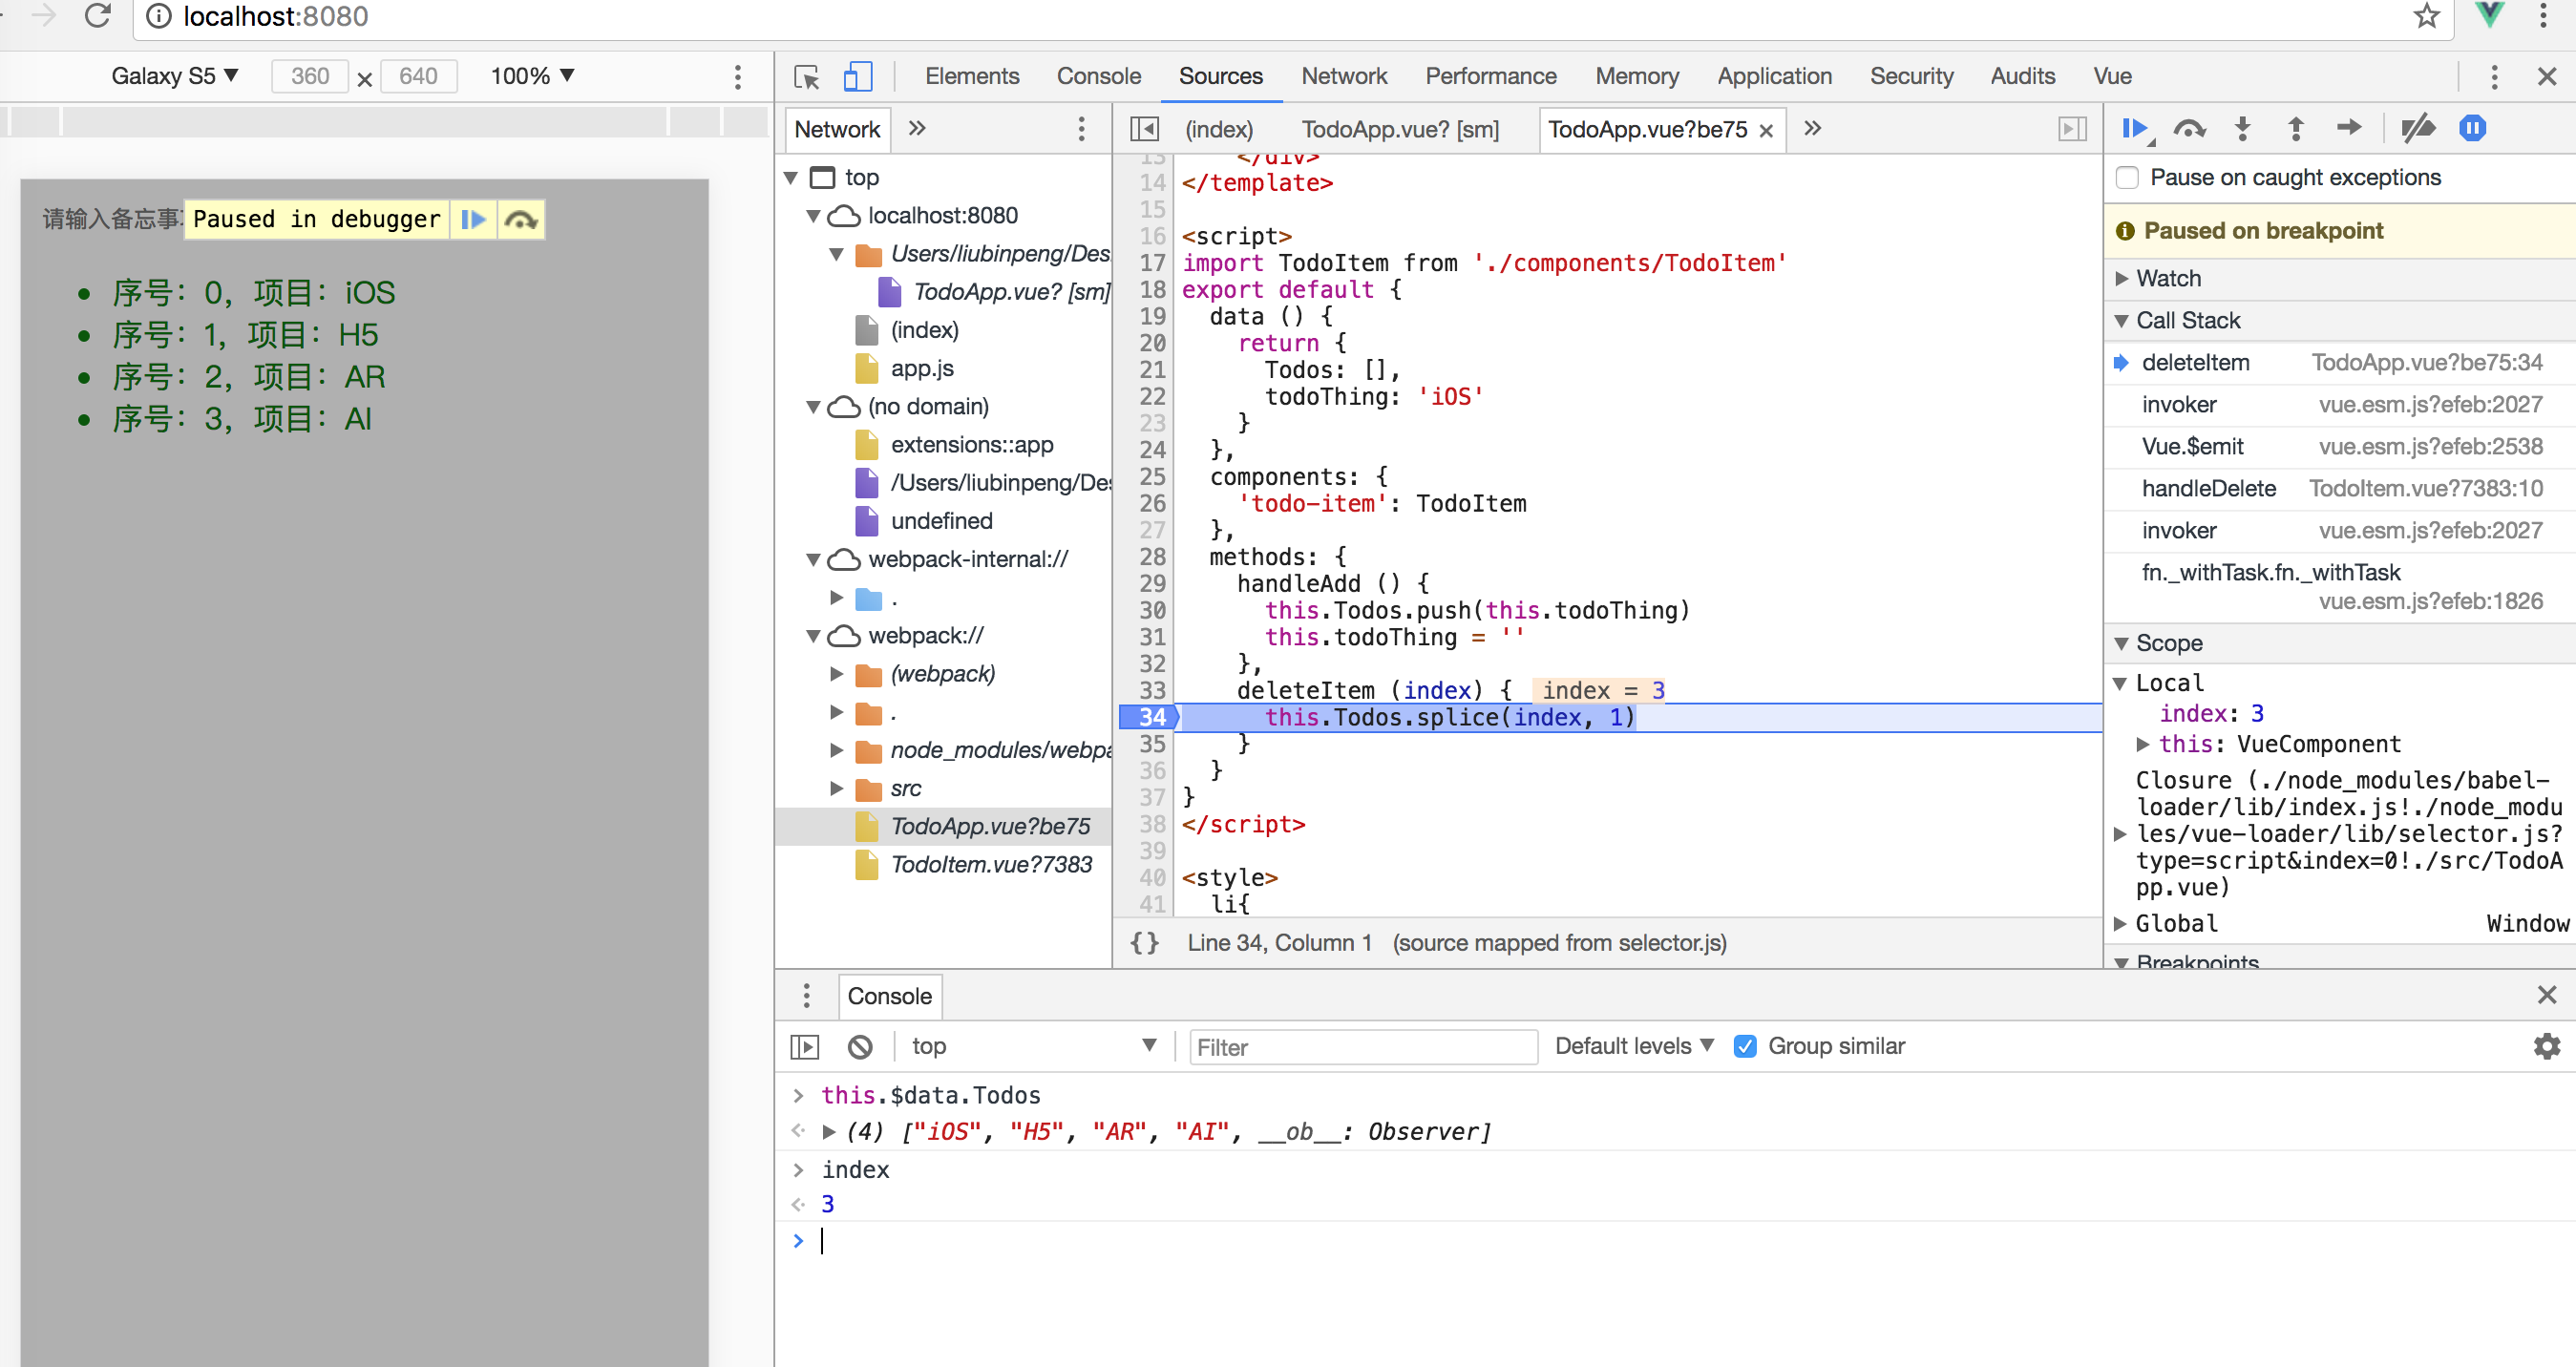
10、Vue 中 ... 底层的做法是 ** render()**方法, 对 template 中的元素依次遍历创造节点
11、使用 stylus 写 css 的时候需要告诉 webpack如何处理代码,所以
<style lang="stylus">
...
</style>
12、在使用 v-for 或 jsx 的map方法时候需要在生成的节点设置一个唯一的key作为标识,这样下次渲染的时候就可以根据 key 值判断,是否需要刷新 dom ,提高了效率
13、props 的另一种写法
props:[
    todos:{
        type:Array,
        required:true
    }
]
14、css 单独打包,缓存下来,提高程序的体验。需要使用extrat-text-webpack-plugin
15、业务代码与框架代码如果打包在一起,后期维护很麻烦(因为框架代码基本不需要很快更新,但是业务代码经常更新),所以应该拆分出来,单独打包。将框架代码方便缓存。
16、webpack 的2个概念: hash: 各个文件生成的hash值相同 chunkhash:不同文件(模块)生成的hash值不同
- Vue 使用官方组件(比如 vue-resource)
- 先引入
- 再 use(必须在 main.js 中)
import VueResource from 'vue-resource'
Vue.use(VueResource);
-
第三方组件
- 哪里用,哪里引入(比如 axios)
-
npm install 组件名 --save
将安装的组件名称的依赖写入 package.json
-
网络请求组件
- vue-resource
- axios
- fetch-jsonp
-
父组件给子组件传值
-
父组件在调用子组件的时候传递
-
子组件 声明 porps
-
同时可以在子组件接收的时候验证传值的正确性
props:['name','age']

props:{
    'name':String,
    'age':Number
}
-
-
父组件给子组件传递方法
//父 <script> export default{ methods:{ run(){ alert("run"); } } } </script> <v-header :run="run()"></v-header> //子 export default{ props:["run"], methods:{ test(){ run(); } } } -
子组件可以通过上面传递值给父组件
-
父组件可以将自身传递给子组件。所以可以在子组件里面访问父组件的属性和执行父组件的方法
-
父组件主动获取子组件的数据和方法
-
在调用子组件的时候给子组件定义一个 ref
<v-heaer ref="header"></v-header> -
在父组件里面通过this.$refs.header.属性 和 this.$refs.header.方法
-
子组件里面获取父组件的属性和方法 this.$parent.属性 和this.$parent.方法
-
-
非父子组件间的传值
- 先定义1个中间的组件
- 在需要暴露数据的一方。import 中间组件,调用 $emit(事件名称,数据)
- 在需要接受数据的一方。import 中间组件,调用 $on(事件名称,function(data){ //... })
//中间组件 import Vue from 'Vue'; var VueEvent = new Vue(); export default = Vue; //Home.vue(传递数据给 News.vue) import VueEvent from '../model/VueEvent.js'; VueEvent.$emit("postData",{"name":"杭城小刘"}); //News.vue(接收数据) import VueEvent from '../model/VueEvent.js'; new Vue({ mounted(){ VueEvent.$on("postData",function(data){ console.log("从Home组件接收到的数据:"+data); }); } }); -
路由的使用规则
-
创建、引用组件(main.js)
import Home form './Components/Home.vue' import News form './Components/News.vue' -
导入 vue-router 并 use(main.js)
import VueRouter from 'vue-router' Vue.use(VueRouter); -
配置路由(main.js)
const routes = [ {path:"/home",component:"Home"}, {path:"/news",component:"News"}, ]; -
实例化 router(main.js)
const router = new VueRouter({ routes //等于 routes:routes,只有当key和value一致的时候可以简写 }); -
挂载 router(main.js)
var vue = new Vue({ el:"#app", router, data(){ return { msg:"root components" } } }); -
在模版里面放上路由的出口。将 写到根组件上 (App.vue)
//App.vue
<router-view></router-view>
-
-
要实现类似导航效果,可以使用
<router-link to="/home">首页</router-link> <router-link to="/news">新闻</router-link> -
默认首页
const routes = [ {path:"/home",component:"Home"}, {path:"/news",component:"News"}, {path:"*",redirect:"News"} //默认跳转到首页 ]; -
Vue 动态路由和 Get 传值
<ul> <li v-for="(item,key) in news"><router-link to="/content"></router-link>{ {item} }</li> </ul> //新增加的 router-link 需要在路由配置里面添加配置项。 const routes = [ {path:"/home",component:"Home"}, {path:"/news",component:"News"}, {path:"/content",component:"Content"}, {path:"*",redirect:"News"} //默认跳转到首页 ];-
上面的写法是静态路由,也就是不能传递参数
-
那么什么是动态路由,也就是可以传递参数
//新增加的 router-link 需要在路由配置里面添加配置项。 const routes = [ {path:"/home",component:"Home"}, {path:"/news",component:"News"}, {path:"/content:newid",component:"Content"}, //动态路由 {path:"*",redirect:"News"} //默认跳转到首页 ]; -
子组件页面获取动态路由传递过来的值
this.$route.params -
子组件拿到父组件动态传递过来的值用动态路由
<ul> <li v-for="(item,key) in news"><router-link :to="'/content' + key" ></router-link>{ {item} }</li> </ul> const routes = [ {path:"/home",component:"Home"}, {path:"/news",component:"News"}, {path:"/content:newid",component:"Content"}, //动态路由 {path:"*",redirect:"News"} //默认跳转到首页 ]; this.$route.params -
Get 传值
const routes = [
    {path:"/home",component:"Home"},
    {path:"/news",component:"News"},
    {path:"/content",component:"Content"},	//动态路由
    {path:"/product",component:"Product"},	//
    {path:"*",redirect:"News"}	//默认跳转到首页
];

<ul>
	<li v-for="(item,key) in news"><router-link :to="'/content?id='+key" ></router-link>{ {item} }</li>
</ul>

//拿到值
this.$route.query
-
-
编程式导航(JS 跳转控)
//直接跳转到某个组件 this.$route.push({path:'News' }); //跳转到某个组件并且传递值 this.$route.push({path:'/content/495'});-
命名路由跳转
const routes = [
    {path:"/home",component:"Home"},
    {path:"/news",component:"News"},
    {path:"/content",component:"Content",name:'news'},	//动态路由
    {path:"/product",component:"Product"},	//
    {path:"*",redirect:"News"}	//默认跳转到首页
];
//跳转
this.$router.push({name:'news'});
-
-
vue-router 默认的是 hash 模式, 也就是 127.0.0.1/# 这种。所以我们在初始化 vue-router 的时候可以修改它的模式
const VueRouter = new VueRouter({ mode: 'history',//hash 模式改为 history 模式 routs }) -
嵌套路由(比如顶部的菜单栏不变,点击左边的菜单栏实现页面内容的切换)
//注册路由嵌套 const routes = [ {path:"/home",component:"Home"}, {path:"/news",component:"News"}, { path:"/user", components:"User", children:[ {path:'useradd',component:'UserAdd'}, {path:'userlist',component:'UserList'}, ] }, {path:"/content",component:"Content",name:'news'}, //动态路由 {path:"/product",component:"Product"}, // {path:"*",redirect:"News"} //默认跳转到首页 ]; //将<router-view></router-view>放到动态加载的子组件的地方 //User.vue <template> <div> <ul> <router-link to='/useradd'></router-link><li>增加用户</li> <router-link to='/userlist'></router-link><li>用户列表</li> </ul> <router-view></router-view> </div> </template> -
Vuex:主要解决不同组件之间的数据共享、数据持久化(不适合与小项目,主要用于大项目)
-
安装 vuex
-
src 目录下新建一个 vuex 的文件夹
-
vuex 文件夹下面新建一个 store.js 文件
-
引入 vuex
import Vue from 'vue' import Vuex from 'vuex' Vue.use(Vuex); -
定义数据
// state 在 vuex 中用于存储数据 var state = { count:1 } -
定义方法
var muations = { incCount(){ ++state.count; } } -
暴露 vuex
const store = new Vuex.Store({
    state,
    mutations
});

export default store;
-
-
使用 vuex(解决不同组件之间数据共享问题;数据持久化)
-
引入 vuex
import store from '../vuex/store.js' -
注册 vuex
export default{ data(){ return { msg: 'Hello' } }, store, methods:{ } } -
使用
//访问属性 this.$store.state.count //触发方法+不带参数 this.$store.commit('incCount'); //触发方法+不带参数 this.$store.commit('方法名',参数); var mutation = { addList(state,data{ state.list = data; } } -
getters 类似于计算属性,改变 state 里面的 count 的值会触发 setters 里面的方法,从而在里面可以获取新的值(做一些逻辑操作)
var getters = { computedCount: (state) => { return state.count*2 } } -
action 类似于 mutation ,在外面使用的时候用 this.$state.dispath('方法名')
-
-
某些页面可能我们只需要切换数据源和样式模版。所以数据源有可能是变化的,页面的模版也是变化的。 这样子我们可能会用到
v-if、v-else-if...v-else来切换页面的模版。但是在模版里面去v-for循环展示数据源。
早期遇到错误,大概意思是说我们循环动态生成的元素,有 key 重复了,最后查找资料得到解决方案。在判断模版的时候需要使用<template v-if="type==1"></template><template v-else-if="collectType==4"> <b-card v-for="(item, index) in qualifications" v-bind:key="'qualification' + index" :title="item.company" sub-title=""> <p class="card-text"> <em>法定代表人:{ {item.legalperson} }</em> <em>成立时间:{ {item.create} }</em> <em>注册资本:{ {item.capital} }(万元)</em> </p> <p v-for="(qualification,index) in item.qualifications" v-bind:key="index" style="font-size:13px;"> { {qualification} } </p> </b-card> </template>