mirror of
https://github.com/NohamR/knowledge-kit.git
synced 2026-05-25 12:27:15 +00:00

534 lines
21 KiB
Markdown
534 lines
21 KiB
Markdown
# OCLint 实现 Code Review - 给你的代码提提质量
|
||
|
||
工程代码质量,一个永恒的话题。好的质量的好处不言而喻,团队成员间除了保持统一的风格和较高的自我约束力之外,还需要一些工具来统计分析代码质量问题。
|
||
|
||
本文就是针对 OC 项目,提出的一个思路和实践步骤的记录,最后形成了一个可以直接用的脚本。如果觉得文章篇幅过长,则直接可以下载[脚本](https://github.com/FantasticLBP/knowledge-kit/tree/master/assets/auto_Lint.sh)
|
||
|
||
> OCLint is a static code analysis tool for improving quality and reducing defects by inspecting C, C++ and Objective-C code and looking for potential problems ...
|
||
|
||
从官方的解释来看,它通过检查 C、C++、Objective-C 代码来寻找潜在问题,来提高代码质量并减少缺陷的静态代码分析工具
|
||
|
||
|
||
|
||
## OCLint 的下载和安装
|
||
|
||
有3种方式安装,分别为 Homebrew、源代码编译安装、下载安装包安装。
|
||
区别:
|
||
- 如果需要自定义 Lint 规则,则需要下载源码编译安装
|
||
- 如果仅仅是使用自带的规则来 Lint,那么以上3种安装方式都可以
|
||
|
||
|
||
### 1. Homebrew 安装
|
||
|
||
在安装前,确保安装了 homebrew。步骤简单快捷
|
||
|
||
```Shell
|
||
brew tap oclint/formulae
|
||
brew install oclint
|
||
```
|
||
|
||
|
||
### 2. 安装包安装
|
||
|
||
- 进入 OCLint 在 Github 中的[地址](https://github.com/oclint/oclint/releases),选择 Release。选择最新版本的安装包(目前最新版本为:oclint-0.13.1-x86_64-darwin-17.4.0.tar.gz)
|
||
- 解压下载文件。将文件存放到一个合适的位置。(比如我选择将这些需要的源代码存放到 Document 目录下)
|
||
- 在终端编辑当前环境的配置文件,我使用的是 zsh,所以编辑 .zshrc 文件。(如果使用系统的终端则编辑 .bash_profile 文件)
|
||
```Shell
|
||
OCLint_PATH=/Users/liubinpeng/Desktop/oclint/build/oclint-release
|
||
export PATH=$OCLint_PATH/bin:$PATH
|
||
```
|
||
- 将配置文件 source 一下。
|
||
```Shell
|
||
source .zshrc // 如果你使用系统的终端则执行 soucer .bash_profile
|
||
```
|
||
- 验证是否安装成功。在终端输入 `oclint --version`
|
||
|
||
|
||
### 3. 源码编译安装
|
||
|
||
- homebrew 安装 CMake 和 Ninja 这2个编译工具
|
||
```Shell
|
||
brew install cmake ninja
|
||
```
|
||
|
||
- 进入 Github 搜索 OCLint,clone 源码
|
||
```Shell
|
||
gc https://github.com/oclint/oclint
|
||
```
|
||
|
||
- 进入 oclint-scripts 目录,执行 ./make 命令。这一步的时间非常长。会下载 oclint-json-compilation-database、oclint-xcodebuild、llvm 源码以及 clang 源码。并进行相关的编译得到 oclint。且必须使用翻墙环境不然会报 timeout。如果你的电脑支持翻墙环境,但是在终端下不支持翻墙,可以查看我的这篇[文章](https://github.com/FantasticLBP/knowledge-kit/blob/master/第六部分%20开发杂谈/6.11.md)
|
||
```Shell
|
||
./make
|
||
```
|
||
|
||
- 编译结束,进入同级 build 文件夹,该文件夹下的内容即为 oclint。可以看到 `build/oclint-release`。方式2下载的安装包的内容就是该文件夹下的内容。
|
||
|
||
- cd 到根目录,编辑环境文件,比如我 zsh 对应的 .zshrc 文件。编辑下面的内容
|
||
```Shell
|
||
OCLint_PATH=/Users/liubinpeng/Desktop/oclint/build/oclint-release
|
||
export PATH=$OCLint_PATH/bin:$PATH
|
||
```
|
||
|
||
- source 下 .zhsrc 文件
|
||
```Shell
|
||
source .zshrc // source .bash_profile
|
||
```
|
||
|
||
- 进入 `oclint/build/oclint-release` 目录执行脚本
|
||
```Shell
|
||
cp ~/Documents/oclint/build/oclint-release/bin/oclint* /usr/local/bin/
|
||
ln -s ~/Documents/oclint/build/oclint-release/lib/oclint /usr/local/lib
|
||
ln -s ~/Documents/oclint/build/oclint-release/lib/clang /usr/local/lib
|
||
```
|
||
这里使用 ln -s,把 lib 中的 clang 和 oclint 链接到 /usr/local/bin 目录下。这样做的目的是为了后面如果编写了自己创建的 lint 规则,不必要每次更新自定义的 rule 库,必须手动复制到 /usr/local/bin 目录下。
|
||
|
||
- 验证下 OCLint 是否安装成功。输入 oclint --version
|
||
|
||
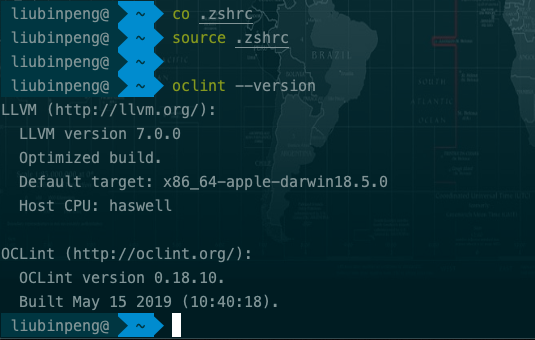
|
||
|
||
注意:如果你采用源码编译的时候直接 clone 官方的源码会有问题,编译不过,所以提供了一个可以编译过的[版本](https://github.com/FantasticLBP/oclint)。分支切换到 llvm-7.0。
|
||
|
||
|
||
### 4. xcodebuild 的安装
|
||
xcode 下载安装好就已经成功安装了
|
||
|
||
|
||
### 5. xcpretty 的安装
|
||
|
||
先决条件,你的机器已经安装好了 Ruby gem.
|
||
|
||
```Shell
|
||
gem install xcpretty
|
||
```
|
||
|
||
|
||
|
||
## 二、 自定义 Rule
|
||
|
||
OClint 提供了 70+ 项的检查规则,你可以直接去使用。但是某些时候你需要制作自己的检测规则,接下来就说说如何自定义 lint 规则。
|
||
|
||
|
||
1. 进入 ~/Document/oclint 目录,执行下面的脚本
|
||
|
||
```shell
|
||
oclint-scripts/scaffoldRule CustomLintRules -t ASTVisitor
|
||
```
|
||
其中,*CustomLintRules* 就是定义的检查规则的名字, *ASTVisitor* 就是你继承的 lint 规则
|
||
|
||
可以继承的规则有:ASTVisitor、SourceCodeReader、ASTMatcher。
|
||
|
||
2. 执行上面的脚本,会生成下面的文件
|
||
- Documents/oclint/oclint-rules/rules/custom/CustomLintRulesRule.cpp
|
||
- Documents/oclint/oclint-rules/test/custom/CustomLintRulesRuleTest.cpp
|
||
|
||
3. 要方便的开发自定义的 lint 规则,则需要生成一个 xcodeproj 项目。切换到项目根目录,也就是 Documents/oclint,执行下面的命令
|
||
```Shell
|
||
mkdir Lint-XcodeProject
|
||
cd Lint-XcodeProject
|
||
touch generate-lint-rules.sh
|
||
chmod +x generate-lint-rules.sh
|
||
```
|
||
给上面的 generate-lint-rules.sh 里面添加下面的脚本
|
||
|
||
```Shell
|
||
#! /bin/sh -e
|
||
cmake -G Xcode \
|
||
-D CMAKE_CXX_COMPILER=../build/llvm-install/bin/clang++ \
|
||
-D CMAKE_C_COMPILER=../build/llvm-install/bin/clang \
|
||
-D OCLINT_BUILD_DIR=../build/oclint-core \
|
||
-D OCLINT_SOURCE_DIR=../oclint-core \
|
||
-D OCLINT_METRICS_SOURCE_DIR=../oclint-metrics \
|
||
-D OCLINT_METRICS_BUILD_DIR=../build/oclint-metrics \
|
||
-D LLVM_ROOT=../build/llvm-install/ ../oclint-rules
|
||
```
|
||
|
||
4. 执行 generate-lint-rules.sh 脚本(./generate-lint-rules.sh)。如果出现下面的 Log 则说明生成 xcodeproj 项目成功
|
||
|
||
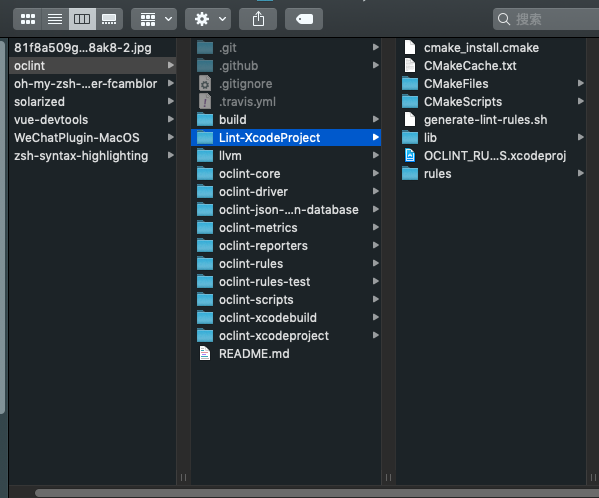
|
||

|
||
|
||
5. 打开步骤4生成的项目,看到有很多文件夹,代表 oclint 自带的 lint 规则,我们自定义的 lint 规则在最下面。
|
||
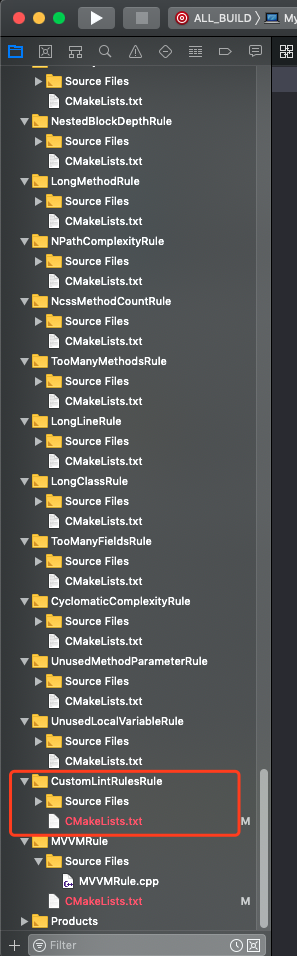
|
||
|
||
关于如何自定义 lint 规则的具体还没有深入研究,这里给个例子
|
||
|
||
<details>
|
||
<summary>点击查看示例代码</summary>
|
||
|
||
```C
|
||
#include "oclint/AbstractASTVisitorRule.h"
|
||
#include "oclint/RuleSet.h"
|
||
|
||
using namespace std;
|
||
using namespace clang;
|
||
using namespace oclint;
|
||
#include <iostream>
|
||
|
||
class MVVMRule : public AbstractASTVisitorRule<MVVMRule>
|
||
{
|
||
public:
|
||
virtual const string name() const override
|
||
{
|
||
return "Property in 'ViewModel' Class interface should be readonly.";
|
||
}
|
||
|
||
virtual int priority() const override
|
||
{
|
||
return 3;
|
||
}
|
||
|
||
virtual const string category() const override
|
||
{
|
||
return "mvvm";
|
||
}
|
||
|
||
virtual unsigned int supportedLanguages() const override
|
||
{
|
||
return LANG_OBJC;
|
||
}
|
||
|
||
#ifdef DOCGEN
|
||
virtual const std::string since() const override
|
||
{
|
||
return "0.18.10";
|
||
}
|
||
|
||
virtual const std::string description() const override
|
||
{
|
||
return "Property in 'ViewModel' Class interface should be readonly.";
|
||
}
|
||
|
||
virtual const std::string example() const override
|
||
{
|
||
return R"rst(
|
||
.. code-block:: cpp
|
||
|
||
@interface FooViewModel : NSObject // This is a "ViewModel" Class.
|
||
|
||
@property (nonatomic, strong) NSObject *bar; // should be readonly.
|
||
|
||
@end
|
||
)rst";
|
||
}
|
||
|
||
virtual const std::string fileName() const override
|
||
{
|
||
return "MVVMRule.cpp";
|
||
}
|
||
|
||
#endif
|
||
|
||
virtual void setUp() override {}
|
||
virtual void tearDown() override {}
|
||
|
||
/* Visit ObjCImplementationDecl */
|
||
bool VisitObjCImplementationDecl(ObjCImplementationDecl *node)
|
||
{
|
||
ObjCInterfaceDecl *interface = node->getClassInterface();
|
||
|
||
bool isViewModel = interface->getName().endswith("ViewModel");
|
||
if (!isViewModel) {
|
||
return false;
|
||
}
|
||
for (auto property = interface->instprop_begin(),
|
||
propertyEnd = interface->instprop_end(); property != propertyEnd; property++)
|
||
{
|
||
clang::ObjCPropertyDecl *propertyDecl = (clang::ObjCPropertyDecl *)*property;
|
||
if (propertyDecl->getName().startswith("UI")) {
|
||
addViolation(propertyDecl, this);
|
||
}
|
||
auto attrs = propertyDecl->getPropertyAttributes();
|
||
bool isReadwrite = (attrs & ObjCPropertyDecl::PropertyAttributeKind::OBJC_PR_readwrite) > 0;
|
||
if (isReadwrite && isViewModel) {
|
||
addViolation(propertyDecl, this);
|
||
}
|
||
}
|
||
return true;
|
||
}
|
||
};
|
||
|
||
static RuleSet rules(new MVVMRule());
|
||
```
|
||
</details>
|
||
|
||
6. 修改自定义规则后就需要编译。成功后在 Products 目录下会看到对应名称的 CustomLintRulesRule.dylib 文件,就需要复制到 /Documents/oclint/oclint-release/lib/oclint/rules。讲道理,生成新的 lint rule 文件,需要把新的 dylib 文件复制到 /usr/local/lib。因为我们在源代码安装的第4部,设置了 ln -s 链接,所以不需要每次复制到相应文件夹。
|
||
|
||
但是还是比较麻烦,每次都需要编译新的 lint rule 之后需要将相应的 dylib 文件复制到源代码目录下的 oclint-release/lib/oclint/rules 目录下,本着「可以偷懒绝不动手」的原则,在自定义的 rule 的 target 中,在 Build Phases 选项下 CMake PostBuild Rules 中的脚本下将下面的代码复制进去
|
||
|
||
```Shell
|
||
cp /Users/liubinpeng/Documents/oclint/Lint-XcodeProject/rules.dl/Debug/libCustomLintRulesRule.dylib /Users/liubinpeng/Documents/oclint/build/oclint-release/lib/oclint/rules/libCustomLintRulesRule.dylib
|
||
```
|
||
|
||
7. 规则限定的3个类说明:
|
||
```Shell
|
||
RuleBase
|
||
|
|
||
|-AbstractASTRuleBase
|
||
| |_ AbstractASTVisitorRule
|
||
| |_AbstractASTMatcherRule
|
||
|
|
||
|-AbstractSourceCodeReaderRule
|
||
```
|
||
- AbstractSourceCodeReaderRule:eachLine 方法,读取每行的代码,如果想编写的规则是需要针对每行的代码内容,则可以继承自该类
|
||
- AbstractASTVisitorRule:可以访问 AST 上特定类型的所有节点,可以检查特定类型的所有节点是递归实现的。在 **apply** 方法内可以看到代码实现。开发者只需要重载 bool visit* 方法来访问特定类型的节点。其值表明是否继续递归检查
|
||
- AbstractASTMatcherRule:实现 setUpMatcher 方法,在方法中添加 matcher,当检查发现匹配结果时会调用 callback 方法。然后通过 callback 方法来继续对匹配到的结果进行处理
|
||
|
||
8. 知其所以然
|
||
oclint 依赖与源代码的语法抽象树(AST)。开源 clang 是 oclint 获的语法抽象树的依赖工具。你如果想对 AST 有个了解,可以查看这个[视频](https://www.youtube.com/watch?v=VqCkCDFLSsc&feature=youtu.be),相关讲解https%3A%2F%2Fjonasdevlieghere.com%2Funderstanding-the-clang-ast%2F)
|
||
|
||
如果想查看某个文件的 AST 结构,你可以进入该文件的命令行,然后执行下面的脚本
|
||
```Shell
|
||
clang -Xclang -ast-dump -fsyntax-only main.m
|
||
```
|
||
|
||
## 三、 Homebrew 方式安装的 oclint 如何使用自定义规则
|
||
|
||
1. 查看 OCLint 安装路径
|
||
```Shell
|
||
which oclint
|
||
// 输出:/usr/local/bin/oclint
|
||
ls -al /usr/local/bin/oclint
|
||
// 输出:本机安装路径
|
||
```
|
||
|
||
2. 把上面生成的新的 lint rule 下的 dylib 文件复制到步骤1得到的额本机安装路径下
|
||
|
||
|
||
|
||
## 四、 使用 oclint
|
||
|
||
|
||
### 在命令行中使用
|
||
|
||
1. 如果项目使用了 Cocopod,则需要指定 -workspace xxx.workspace
|
||
2. 每次编译之前需要 clean
|
||
|
||
|
||
实操:
|
||
|
||
- 进入项目
|
||
```Shell
|
||
cd /Workspace/Native/iOS/lianhua
|
||
```
|
||
- 查看项目基本信息
|
||
```Shell
|
||
xcodebuild -list
|
||
//输出
|
||
information about project "BridgeLabiPhone":
|
||
Targets:
|
||
BridgeLabiPhone
|
||
lint
|
||
|
||
Build Configurations:
|
||
Debug
|
||
Release
|
||
|
||
If no build configuration is specified and -scheme is not passed then "Release" is used.
|
||
|
||
Schemes:
|
||
BridgeLabiPhone
|
||
lint
|
||
```
|
||
|
||
- 编译
|
||
```Shell
|
||
xcodebuild -scheme BridgeLabiPhone -workspace BridgeLabiPhone.xcworkspace clean && xcodebuild -scheme BridgeLabiPhone -workspace BridgeLabiPhone.xcworkspace -configuration Debug | xcpretty -r json-compilation-database -o compile_commands.json
|
||
```
|
||
|
||
编译成功后,会在项目的文件夹下出现 compile_commands.json 文件
|
||
|
||
- 生成 html 报表
|
||
```Shell
|
||
oclint-json-compilation-database -e Pods -- -report-type html -o oclintReport.html
|
||
```
|
||
|
||
看到有报错,但是报错信息太多了,不好定位,利用下面的脚本则可以将报错信息写入 log 文件,方便查看
|
||
|
||
```Shell
|
||
oclint-json-compilation-database -e Pods -- -report-type html -o oclintReport.html 2>&1 | tee 1.log
|
||
```
|
||
|
||
报错信息是:**oclint: error: one compiler command contains multiple jobs:**
|
||
查找资料,解决方案如下
|
||
- 将 Project 和 Targets 中 Building Settings 下的 COMPILER_INDEX_STORE_ENABLE 设置为 **NO**
|
||
- 在 podfile 中 target 'xx' do 前面添加下面的脚本
|
||
|
||
```Shell
|
||
post_install do |installer|
|
||
installer.pods_project.targets.each do |target|
|
||
target.build_configurations.each do |config|
|
||
config.build_settings['COMPILER_INDEX_STORE_ENABLE'] = "NO"
|
||
end
|
||
end
|
||
end
|
||
```
|
||
|
||
然后继续尝试编译,发现还是报错,但是报错信息改变了,如下
|
||
|
||

|
||
|
||
看到报错信息是默认的警告数量超过限制,则 lint 失败。事实上 lint 后可以跟参数,所以我们修改脚本如下
|
||
|
||
```Shell
|
||
oclint-json-compilation-database -e Pods -- -report-type html -o oclintReport.html -rc LONG_LINE=9999 -max-priority-1=9999 -max-priority-2=9999 -max-priority-3=9999
|
||
```
|
||
|
||
生成了 lint 的结果,查看 html 文件可以具体定位哪个代码文件,哪一行哪一列有什么问题,方便修改。
|
||
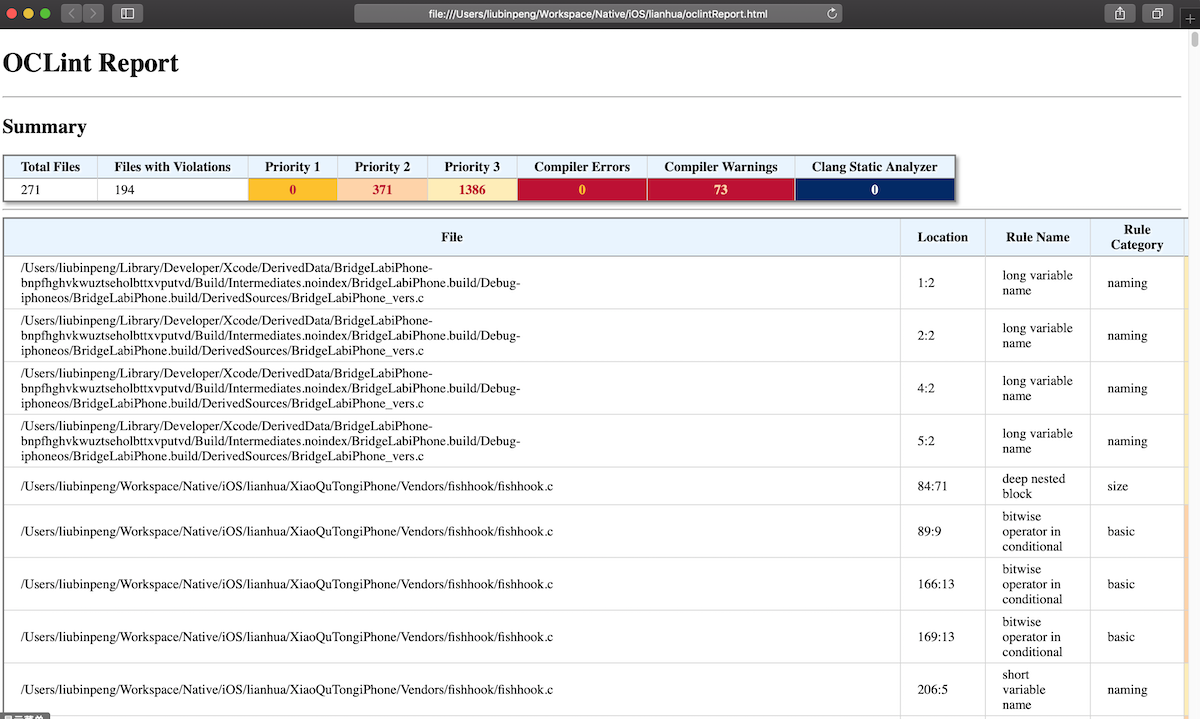
|
||
|
||
- 如果项目工程太大,整个 lint 会比较耗时,所幸 oclint 支持针对某个代码文件夹进行 lint
|
||
```Shell
|
||
oclint-json-compilation-database -i 需要静态分析的文件夹或文件 -- -report-type html -o oclintReport.html 其他的参数
|
||
```
|
||
|
||
- 参数说明
|
||
|
||
| 名称 | 描述 | 默认阈值 |
|
||
| ----------------------- | ---------------------------- | ---- |
|
||
| CYCLOMATIC_COMPLEXITY | 方法的循环复杂性(圈负责度) | 10 |
|
||
| LONG_CLASS | C类或Objective-C接口,类别,协议和实现的行数 | 1000 |
|
||
| LONG_LINE | 一行代码的字符数 | 100 |
|
||
| LONG_METHOD | 方法或函数的行数 | 50 |
|
||
| LONG_VARIABLE_NAME | 变量名称的字符数 | 20 |
|
||
| MAXIMUM_IF_LENGTH | `if`语句的行数 | 15 |
|
||
| MINIMUM_CASES_IN_SWITCH | switch语句中的case数 | 3 |
|
||
| NPATH_COMPLEXITY | 方法的NPath复杂性 | 200 |
|
||
| NCSS_METHOD | 一个没有注释的方法语句数 | 30 |
|
||
| NESTED_BLOCK_DEPTH | 块或复合语句的深度 | 5 |
|
||
| SHORT_VARIABLE_NAME | 变量名称的字符数 | 3 |
|
||
| TOO_MANY_FIELDS | 类的字段数 | 20 |
|
||
| TOO_MANY_METHODS | 类的方法数 | 30 |
|
||
| TOO_MANY_PARAMETERS | 方法的参数数 | 10 |
|
||
|
||
|
||
|
||
|
||
|
||
|
||
### 在 Xcode 中使用
|
||
|
||
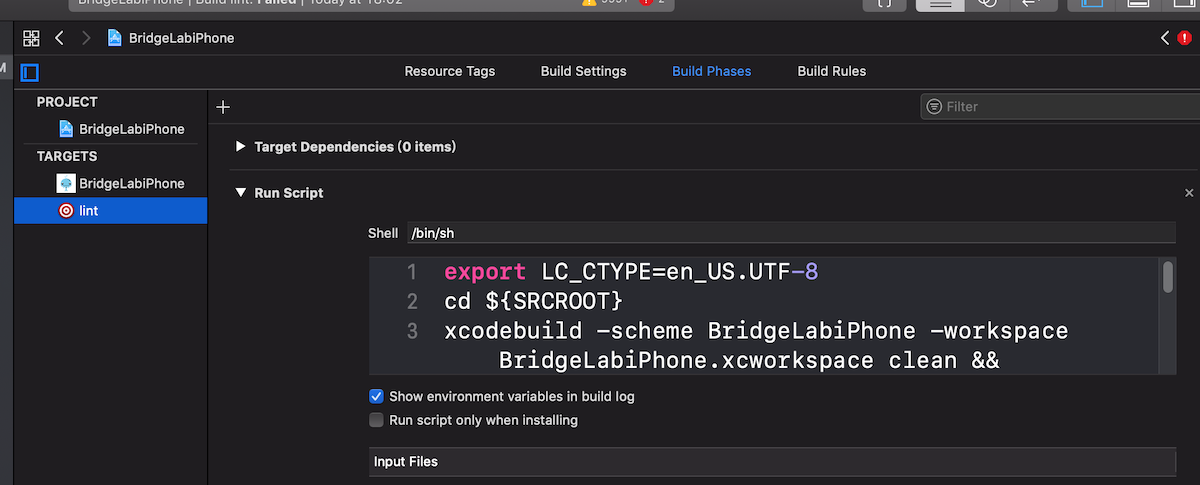
- 在项目的 TARGETS 下面,点击下方的 "+" ,选择 cross-platform 下面的 Aggregate。输入名字,这里命名为 Lint
|
||
|
||
|
||
- 选择对应的 TARGET -> lint。在 Build Phases 下 Run Script 下写下面的脚本代码
|
||
```Shell
|
||
export LC_CTYPE=en_US.UTF-8
|
||
cd ${SRCROOT}
|
||
xcodebuild -scheme BridgeLabiPhone -workspace BridgeLabiPhone.xcworkspace clean && xcodebuild -scheme BridgeLabiPhone -workspace BridgeLabiPhone.xcworkspace -configuration Debug | xcpretty -r json-compilation-database -o compile_commands.json && oclint-json-compilation-database -e Pods -- -report-type xcode
|
||
```
|
||
|
||
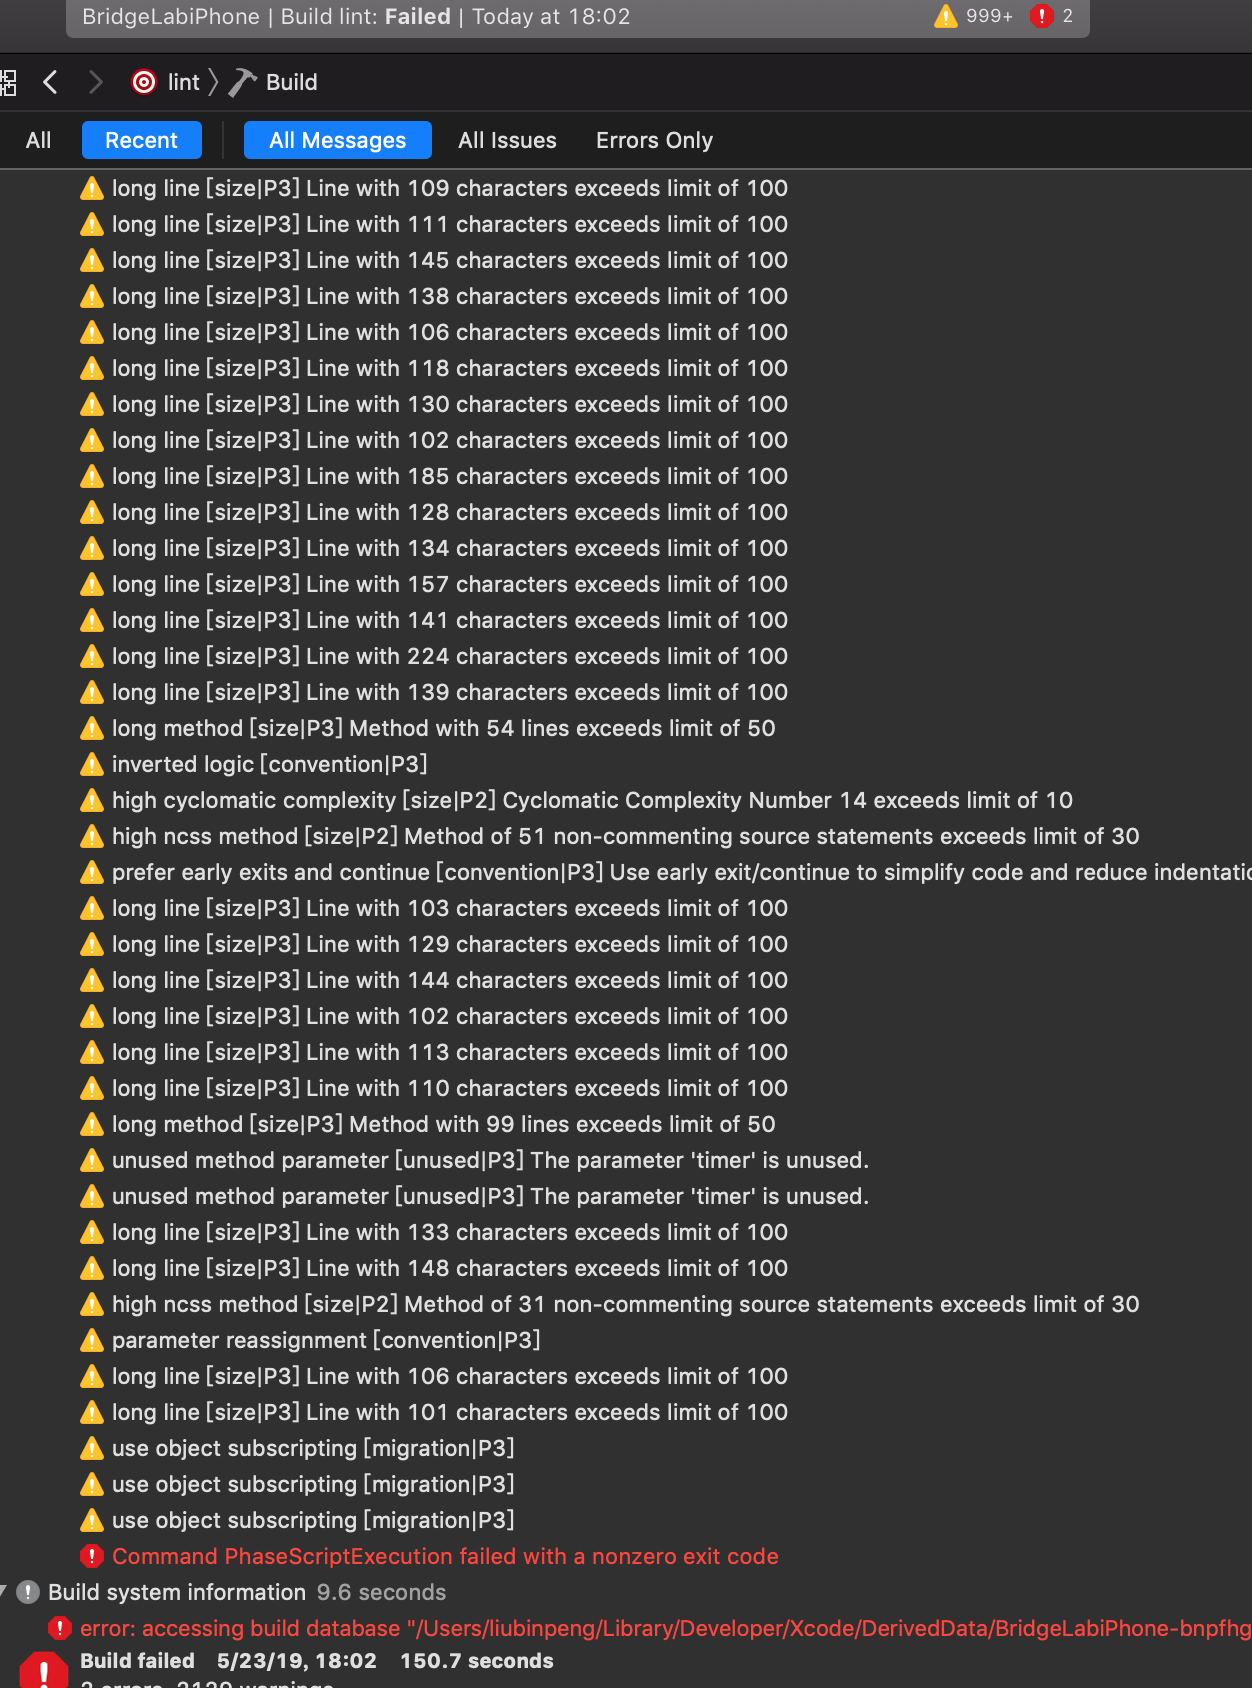
- 说明,虽然有时候没有编译通过,但是看到如下图的关于代码相关的 warning 则达到目的了。
|
||
|
||
|
||
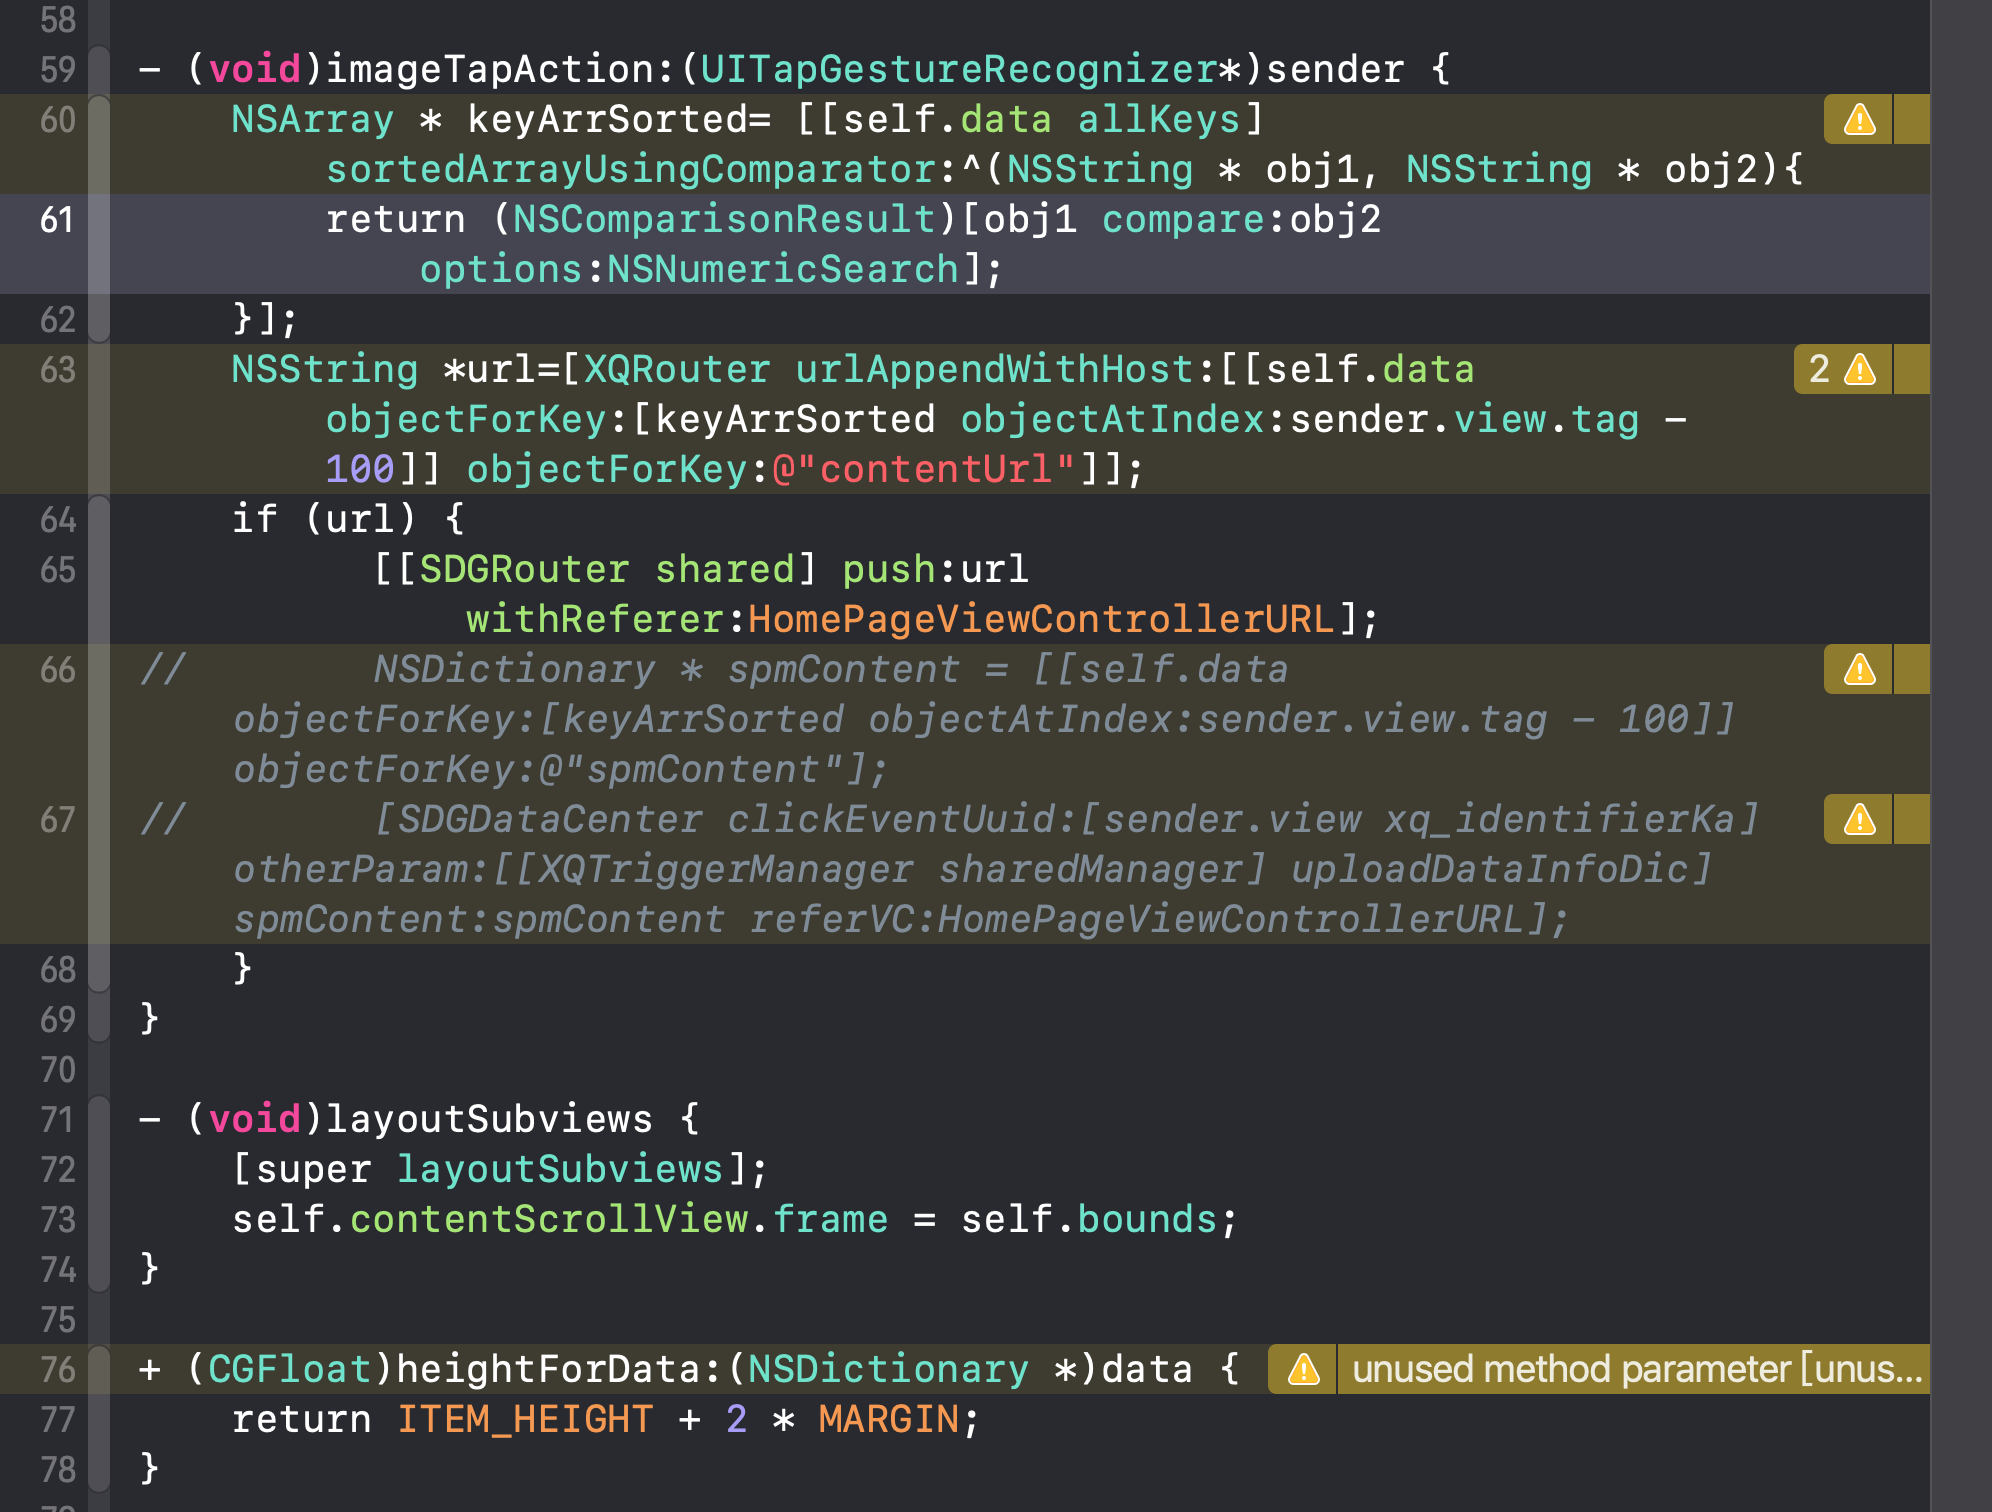
- lint 结果如下,根据相应的提示信息对代码进行调整。当然这只是一种参考,不一定要采纳 lint 给的提示。
|
||
|
||
|
||
|
||
## 脚本化
|
||
|
||
每次都在终端命令行去写 lint 的脚本,效率很低,所以想做成 shell 脚本。需要的同学直接直接拷贝进去,直接在工程的根目录下使用,我这边是一个 Cocopod 工程。拿走拿走别客气
|
||
|
||
```Shell
|
||
#!/bin/bash
|
||
|
||
COLOR_ERR="\033[1;31m" #出错提示
|
||
COLOR_SUCC="\033[0;32m" #成功提示
|
||
COLOR_QS="\033[1;37m" #问题颜色
|
||
COLOR_AW="\033[0;37m" #答案提示
|
||
COLOR_END="\033[1;34m" #颜色结束符
|
||
|
||
# 寻找项目的 ProjectName
|
||
function searchProjectName () {
|
||
# maxdepth 查找文件夹的深度
|
||
find . -maxdepth 1 -name "*.xcodeproj"
|
||
}
|
||
|
||
function oclintForProject () {
|
||
# 预先检测所需的安装包是否存在
|
||
if which xcodebuild 2>/dev/null; then
|
||
echo 'xcodebuild exist'
|
||
else
|
||
echo '🤔️ 连 xcodebuild 都没有安装,玩鸡毛啊? 🤔️'
|
||
fi
|
||
|
||
if which oclint 2>/dev/null; then
|
||
echo 'oclint exist'
|
||
else
|
||
echo '😠 完蛋了你,玩 oclint 却不安装吗,你要闹哪样 😠'
|
||
echo '😠 乖乖按照博文:https://github.com/FantasticLBP/knowledge-kit/blob/master/Chapter1%20-%20iOS/1.63.md 安装所需环境 😠'
|
||
fi
|
||
if which xcpretty 2>/dev/null; then
|
||
echo 'xcpretty exist'
|
||
else
|
||
gem install xcpretty
|
||
fi
|
||
|
||
|
||
# 指定编码
|
||
export LANG="zh_CN.UTF-8"
|
||
export LC_COLLATE="zh_CN.UTF-8"
|
||
export LC_CTYPE="zh_CN.UTF-8"
|
||
export LC_MESSAGES="zh_CN.UTF-8"
|
||
export LC_MONETARY="zh_CN.UTF-8"
|
||
export LC_NUMERIC="zh_CN.UTF-8"
|
||
export LC_TIME="zh_CN.UTF-8"
|
||
export xcpretty=/usr/local/bin/xcpretty # xcpretty 的安装位置可以在终端用 which xcpretty找到
|
||
|
||
searchFunctionName=`searchProjectName`
|
||
path=${searchFunctionName}
|
||
# 字符串替换函数。//表示全局替换 /表示匹配到的第一个结果替换。
|
||
path=${path//.\//} # ./BridgeLabiPhone.xcodeproj -> BridgeLabiPhone.xcodeproj
|
||
path=${path//.xcodeproj/} # BridgeLabiPhone.xcodeproj -> BridgeLabiPhone
|
||
|
||
myworkspace=$path".xcworkspace" # workspace名字
|
||
myscheme=$path # scheme名字
|
||
|
||
# 清除上次编译数据
|
||
if [ -d ./derivedData ]; then
|
||
echo -e $COLOR_SUCC'-----清除上次编译数据derivedData-----'$COLOR_SUCC
|
||
rm -rf ./derivedData
|
||
fi
|
||
|
||
# xcodebuild clean
|
||
xcodebuild -scheme $myscheme -workspace $myworkspace clean
|
||
|
||
|
||
# # 生成编译数据
|
||
xcodebuild -scheme $myscheme -workspace $myworkspace -configuration Debug | xcpretty -r json-compilation-database -o compile_commands.json
|
||
|
||
if [ -f ./compile_commands.json ]; then
|
||
echo -e $COLOR_SUCC'编译数据生成完毕😄😄😄'$COLOR_SUCC
|
||
else
|
||
echo -e $COLOR_ERR'编译数据生成失败😭😭😭'$COLOR_ERR
|
||
return -1
|
||
fi
|
||
|
||
# 生成报表
|
||
oclint-json-compilation-database -e Pods -- -report-type html -o oclintReport.html \
|
||
-rc LONG_LINE=200 \
|
||
-disable-rule ShortVariableName \
|
||
-disable-rule ObjCAssignIvarOutsideAccessors \
|
||
-disable-rule AssignIvarOutsideAccessors \
|
||
-max-priority-1=100000 \
|
||
-max-priority-2=100000 \
|
||
-max-priority-3=100000
|
||
|
||
if [ -f ./oclintReport.html ]; then
|
||
rm compile_commands.json
|
||
echo -e $COLOR_SUCC'😄分析完毕😄'$COLOR_SUCC
|
||
else
|
||
echo -e $COLOR_ERR'😢分析失败😢'$COLOR_ERR
|
||
return -1
|
||
fi
|
||
echo -e $COLOR_AW'将为您自动打开 lint 的分析结果...'$COLOR_AW
|
||
# 用 safari 浏览器打开 oclint 的结果
|
||
open -a "/Applications/Safari.app" oclintReport.html
|
||
}
|
||
|
||
oclintForProject
|
||
```
|
||
|
||
同类型的文章:
|
||
- [开发效率提升利器](https://github.com/FantasticLBP/knowledge-kit/blob/master/Chapter1%20-%20iOS/1.52.md)
|
||
- [oclint介绍](https://github.com/hdw09/CIHexoBlog/blob/master/source/_posts/OClint学习笔记.md)
|
||
- [自定义oclint规则](https://github.com/hdw09/CIHexoBlog/blob/master/source/_posts/OCLint-自定义规则101.md) |